Published Book on Amazon
 |
All of IOT
Starting with the Latest Raspberry Pi from Beginner to Advanced – Volume 1 |
 |
All of IOT
Starting with the Latest Raspberry Pi from Beginner to Advanced – Volume 2 |
출판된 한글판 도서
 |
최신 라즈베리파이(Raspberry Pi)로 시작하는 사
물인터넷(IOT)의 모든 것 – 초보에서 고급까지 (상) |
 |
최신 라즈베리파이(Raspberry Pi)로 시작하는 사
물인터넷(IOT)의 모든 것 – 초보에서 고급까지 (하) |
Original Book Contents
18.4 원격 드라이브 접속
18.4.1 <Samba> 프로그램을 이용한 원격 드라이브 접속
18.4.1.1 <Samba> server 프로그램의 설치
<Samba> 프로그램은 원격에 있는 Raspberry Pi 시스템의 파일을 네트워크 드라이브처럼 사용할 수 있도록 해준다.
먼저 <Samba> 프로그램을 아래와 같이 설치한다.
| pi@raspberrypi ~ $ sudo apt-get install samba |
|
~ 중략 ~ 중략 ~ 중략
|
그리고 <samba-common-bin> 프로그램을 아래와 같이 설치한다.
| pi@raspberrypi ~ $ sudo apt-get install samba-common-bin |
|
~ 중략 ~ 중략 ~ 중략
|
<Samba> 서버를 네트워크에서 공유하기 위해서는 <Samba>에 계정을 추가한다. MS Windows와 같은 외부 시스템에서 Raspberry Pi 시스템에 접속할 때 사용할 계정을 지정한다. 해당 명령을 실행하면 암호를 입력하도록 요구하는데, 이 암호는 네트워크 드라이브로 연결할 때 사용할 암호이다.
| pi@raspberrypi ~ $ sudo smbpasswd -a pi |
| New SMB password: Retype new SMB password: Added user pi. |
그런 다음 <Samba> server에 대한 설정 내용을 조정해야 한다. 이를 위해서 "/etc/samba/smb.conf" 파일을 편집하여 다음과 같이 수정한다.
| # # Sample configuration file for the Samba suite for Debian GNU/Linux. # # # This is the main Samba configuration file. You should read the # smb.conf(5) manual page in order to understand the options listed # here. Samba has a huge number of configurable options most of which # are not shown in this example # # Some options that are often worth tuning have been included as # commented-out examples in this file. # - When such options are commented with ";", the proposed setting # differs from the default Samba behaviour # - When commented with "#", the proposed setting is the default # behaviour of Samba but the option is considered important # enough to be mentioned here # # NOTE: Whenever you modify this file you should run the command # "testparm" to check that you have not made any basic syntactic # errors. # A well-established practice is to name the original file # "smb.conf.master" and create the "real" config file with # testparm -s smb.conf.master >smb.conf # This minimizes the size of the really used smb.conf file # which, according to the Samba Team, impacts performance # However, use this with caution if your smb.conf file contains nested # "include" statements. See Debian bug #483187 for a case # where using a master file is not a good idea. #
#======================= Global Settings =======================
[global]
## Browsing/Identification ###
# Change this to the workgroup/NT-domain name your Samba server will part of workgroup = WORKGROUP
# server string is the equivalent of the NT Description field server string = %h server
# Windows Internet Name Serving Support Section: # WINS Support - Tells the NMBD component of Samba to enable its WINS Server # wins support = no
# WINS Server - Tells the NMBD components of Samba to be a WINS Client # Note: Samba can be either a WINS Server, or a WINS Client, but NOT both ; wins server = w.x.y.z
# This will prevent nmbd to search for NetBIOS names through DNS. dns proxy = no
# What naming service and in what order should we use to resolve host names # to IP addresses ; name resolve order = lmhosts host wins bcast
#### Networking ####
# The specific set of interfaces / networks to bind to # This can be either the interface name or an IP address/netmask; # interface names are normally preferred ; interfaces = 127.0.0.0/8 eth0
# Only bind to the named interfaces and/or networks; you must use the # 'interfaces' option above to use this. # It is recommended that you enable this feature if your Samba machine is # not protected by a firewall or is a firewall itself. However, this # option cannot handle dynamic or non-broadcast interfaces correctly. ; bind interfaces only = yes
#### Debugging/Accounting ####
# This tells Samba to use a separate log file for each machine # that connects log file = /var/log/samba/log.%m
# Cap the size of the individual log files (in KiB). max log size = 1000
# If you want Samba to only log through syslog then set the following # parameter to 'yes'. # syslog only = no
# We want Samba to log a minimum amount of information to syslog. Everything # should go to /var/log/samba/log.{smbd,nmbd} instead. If you want to log # through syslog you should set the following parameter to something higher. syslog = 0
# Do something sensible when Samba crashes: mail the admin a backtrace panic action = /usr/share/samba/panic-action %d
####### Authentication #######
# "security = user" is always a good idea. This will require a Unix account # in this server for every user accessing the server. See # /usr/share/doc/samba-doc/htmldocs/Samba3-HOWTO/ServerType.html # in the samba-doc package for details. # security = user
# You may wish to use password encryption. See the section on # 'encrypt passwords' in the smb.conf(5) manpage before enabling. encrypt passwords = true
# If you are using encrypted passwords, Samba will need to know what # password database type you are using. passdb backend = tdbsam
obey pam restrictions = yes
# This boolean parameter controls whether Samba attempts to sync the Unix # password with the SMB password when the encrypted SMB password in the # passdb is changed. unix password sync = yes
# For Unix password sync to work on a Debian GNU/Linux system, the following # parameters must be set (thanks to Ian Kahan <<kahan@informatik.tu-muenchen.de> for # sending the correct chat script for the passwd program in Debian Sarge). passwd program = /usr/bin/passwd %u passwd chat = *Enter\snew\s*\spassword:* %n\n *Retype\snew\s*\spassword:* %n\n *password\supdated\ssuccessfully* .
# This boolean controls whether PAM will be used for password changes # when requested by an SMB client instead of the program listed in # 'passwd program'. The default is 'no'. pam password change = yes
# This option controls how unsuccessful authentication attempts are mapped # to anonymous connections map to guest = bad user
########## Domains ###########
# Is this machine able to authenticate users. Both PDC and BDC # must have this setting enabled. If you are the BDC you must # change the 'domain master' setting to no # ; domain logons = yes # # The following setting only takes effect if 'domain logons' is set # It specifies the location of the user's profile directory # from the client point of view) # The following required a [profiles] share to be setup on the # samba server (see below) ; logon path = \\%N\profiles\%U # Another common choice is storing the profile in the user's home directory # (this is Samba's default) # logon path = \\%N\%U\profile
# The following setting only takes effect if 'domain logons' is set # It specifies the location of a user's home directory (from the client # point of view) ; logon drive = H: # logon home = \\%N\%U
# The following setting only takes effect if 'domain logons' is set # It specifies the script to run during logon. The script must be stored # in the [netlogon] share # NOTE: Must be store in 'DOS' file format convention ; logon script = logon.cmd
# This allows Unix users to be created on the domain controller via the SAMR # RPC pipe. The example command creates a user account with a disabled Unix # password; please adapt to your needs ; add user script = /usr/sbin/adduser --quiet --disabled-password --gecos "" %u
# This allows machine accounts to be created on the domain controller via the # SAMR RPC pipe. # The following assumes a "machines" group exists on the system ; add machine script = /usr/sbin/useradd -g machines -c "%u machine account" -d /var/lib/samba -s /bin/false %u
# This allows Unix groups to be created on the domain controller via the SAMR # RPC pipe. ; add group script = /usr/sbin/addgroup --force-badname %g
########## Printing ##########
# If you want to automatically load your printer list rather # than setting them up individually then you'll need this # load printers = yes
# lpr(ng) printing. You may wish to override the location of the # printcap file ; printing = bsd ; printcap name = /etc/printcap
# CUPS printing. See also the cupsaddsmb(8) manpage in the # cupsys-client package. ; printing = cups ; printcap name = cups
############ Misc ############
# Using the following line enables you to customise your configuration # on a per machine basis. The %m gets replaced with the netbios name # of the machine that is connecting ; include = /home/samba/etc/smb.conf.%m
# Most people will find that this option gives better performance. # See smb.conf(5) and /usr/share/doc/samba-doc/htmldocs/Samba3-HOWTO/speed.html # for details # You may want to add the following on a Linux system: # SO_RCVBUF=8192 SO_SNDBUF=8192 # socket options = TCP_NODELAY
# The following parameter is useful only if you have the linpopup package # installed. The samba maintainer and the linpopup maintainer are # working to ease installation and configuration of linpopup and samba. ; message command = /bin/sh -c '/usr/bin/linpopup "%f" "%m" %s; rm %s' &
# Domain Master specifies Samba to be the Domain Master Browser. If this # machine will be configured as a BDC (a secondary logon server), you # must set this to 'no'; otherwise, the default behavior is recommended. # domain master = auto
# Some defaults for winbind (make sure you're not using the ranges # for something else.) ; idmap uid = 10000-20000 ; idmap gid = 10000-20000 ; template shell = /bin/bash
# The following was the default behaviour in sarge, # but samba upstream reverted the default because it might induce # performance issues in large organizations. # See Debian bug #368251 for some of the consequences of *not* # having this setting and smb.conf(5) for details. ; winbind enum groups = yes ; winbind enum users = yes
# Setup usershare options to enable non-root users to share folders # with the net usershare command.
# Maximum number of usershare. 0 (default) means that usershare is disabled. ; usershare max shares = 100
# Allow users who've been granted usershare privileges to create # public shares, not just authenticated ones usershare allow guests = yes
#======================= Share Definitions =======================
[homes] comment = Home Directories browseable = no
# By default, the home directories are exported read-only. Change the # next parameter to 'no' if you want to be able to write to them. read only = yes
# File creation mask is set to 0700 for security reasons. If you want to # create files with group=rw permissions, set next parameter to 0775. create mask = 0700
# Directory creation mask is set to 0700 for security reasons. If you want to # create dirs. with group=rw permissions, set next parameter to 0775. directory mask = 0700
# By default, \\server\username shares can be connected to by anyone # with access to the samba server. # The following parameter makes sure that only "username" can connect # to \\server\username # This might need tweaking when using external authentication schemes valid users = %S
# Un-comment the following and create the netlogon directory for Domain Logons # (you need to configure Samba to act as a domain controller too.) ;[netlogon] ; comment = Network Logon Service ; path = /home/samba/netlogon ; guest ok = yes ; read only = yes
# Un-comment the following and create the profiles directory to store # users profiles (see the "logon path" option above) # (you need to configure Samba to act as a domain controller too.) # The path below should be writable by all users so that their # profile directory may be created the first time they log on ;[profiles] ; comment = Users profiles ; path = /home/samba/profiles ; guest ok = no ; browseable = no ; create mask = 0600 ; directory mask = 0700
[printers] comment = All Printers browseable = no path = /var/spool/samba printable = yes guest ok = no read only = yes create mask = 0700
# Windows clients look for this share name as a source of downloadable # printer drivers [print$] comment = Printer Drivers path = /var/lib/samba/printers browseable = yes read only = yes guest ok = no # Uncomment to allow remote administration of Windows print drivers. # You may need to replace 'lpadmin' with the name of the group your # admin users are members of. # Please note that you also need to set appropriate Unix permissions # to the drivers directory for these users to have write rights in it ; write list = root, @lpadmin
# A sample share for sharing your CD-ROM with others. ;[cdrom] ; comment = Samba server's CD-ROM ; read only = yes ; locking = no ; path = /cdrom ; guest ok = yes
# The next two parameters show how to auto-mount a CD-ROM when the # cdrom share is accesed. For this to work /etc/fstab must contain # an entry like this: # # /dev/scd0 /cdrom iso9660 defaults,noauto,ro,user 0 0 # # The CD-ROM gets unmounted automatically after the connection to the # # If you don't want to use auto-mounting/unmounting make sure the CD # is mounted on /cdrom # ; preexec = /bin/mount /cdrom ; postexec = /bin/umount /cdrom
[root] comment = raspberry pi samba server path = / valid user = pi writable = yes browseable = yes
[RootFolder] comment = raspberry pi samba server path = / valid user = pi writable = yes browseable = yes create mask = 0777 public = yes |
설정 항목에 대해서 하나씩 살펴 보기로 하겠다.
■ [RootFolder]
접속할 때 사용하는 폴더 이름을 지정한다.
우리는 여기에 "\\raspberrypi\RootFolder"를 사용한다.
■ comment = raspberry pi samba server
간단한 설명을 지정한다.
■ path = /
Raspberry Pi 시스템의 폴더 중에서 접속하는 위치를 지정한다..
우리는 여기에 "root" directory를 사용한다.
■ valid user = pi
접속할 때 사용하는 사용자 계정을 지정한다.
우리는 여기에 "pi" 계정을 사용한다.
■ writable = yes
Raspberry Pi의 파일들을 편집/생성/삭제가 가능한지를 지정한다.
"no"로 하면 읽기전용으로 접속된다.
■ browseable = yes
공유폴더를 화면에 표시할 것인지를 지정하는 것이며, 접근여부에 대한 설정은 아니기 때문에 권한만 있다면 공유폴더를 열어볼 수 있다.
■ create mask = 0777
이것은 파일이나 directory를 생성할 때 사용할 사용자 권한에 대한 기본 값을 지정하는 것이다.
■ public = yes
공유폴더를 다른 사용자들도 사용할 수 있는지를 지정하는 설정이다
<Samba> server에 대한 설정이 완료되면 <Samba> server를 다시 시작한다. 아래와 같은 방법으로 server를 다시 시작할 수 있다
| pi@raspberrypi ~ $ sudo service samba restart |
| [ ok ] Stopping Samba daemons: nmbd smbd. [ ok ] Starting Samba daemons: nmbd smbd. |
아래의 방법으로 시작해도 동일한 효과를 얻을 수 있다.
| pi@raspberrypi ~ $ sudo /etc/init.d/samba restart |
| [ ok ] Stopping Samba daemons: nmbd smbd. [ ok ] Starting Samba daemons: nmbd smbd. |
18.4.1.2 <Samba> client에서의 연결
Raspberry Pi 시스템에서 <Samba> server에 대한 모든 설정 작업을 완료하면 client 컴퓨터에서 접속을 할 수 있다.
● MS Windows 컴퓨터에서의 연결
MS Windows 컴퓨터가 Raspberry Pi 시스템과 같은 LAN 네트워크에 있는 경우는 별도의 작업을 하지 않고도 간단히 Raspberry Pi 시스템에 있는 파일 server에 접속할 수 있다.
MS Windows 컴퓨터와 Raspberry Pi 시스템이 같은 LAN 네트워크에 속해 있으면 MS Windows 컴퓨터의 네트워크 검색에서 Raspberry Pi 컴퓨터가 자동으로 포함되어서 표시된다. MS Windows 컴퓨터의 탐색기에서 [네트워크]를 검색해 보면 Raspberry Pi 시스템이 보이고, 다시 Raspberry Pi 시스템을 클릭하면 내부에 <Samba> server에서 지정한 폴더의 자료가 보이는 것을 확인할 수 있다.
그림 18‑5 MS windows 네트워크 드라이브 조회
만약 MS Windows 컴퓨터가 Raspberry Pi 시스템과 같은 LAN 네트워크에 있지 않으면, Raspberry Pi 시스템이 자동으로 보이지 않는다. 이때는 원격 <Samba> server 자료에 대해서 별도로 연결정보를 지정하여 접근 가능한 네트워크 드라이브를 만들어 주어야 한다. 이러한 네트워크 드라이브를 만들어 주는 방법에는 [네트워크 드라이브 연결]을 이용하는 방식과 [네트워크 위치 추가]를 이용하는 방식이 있다.
■ 네트워크 드라이브 연결 방식
먼저 [네트워크 드라이브 연결]을 이용하는 방식을 설명한다. 이 방식을 사용하려면 window 탐색기의 오른쪽 탐색창에 있는 [컴퓨터]나 [네트워크] 아이콘을 마우스 오른쪽 버튼으로 클릭한다. 그러면 팝업 메뉴가 나타나는데, 여기서 [네트워크 드라이브 연결] 메뉴를 실행한다. 해당 메뉴를 실행하면 다음과 같이 네트워크 드라이브에 대한 연결정보를 지정하는 화면이 나타나는데, 여기에 Raspberry Pi의 <Samba> server 연결정보를 다음과 같은 형식으로 지정한다.
■ 형식 -- \\<Raspberry Pi Server>\<Samba server Name>
■ 입력 -- \\raseberrypi\RootFolder
|
|
그림 18‑6 MS Windows 네트워크 드라이브 연결
설정을 완료하고 [마침] 버튼을 누르면 파일 서버에 접속하는 작업이 시작된다. 설정 후 처음 접속을 하게 되면 logon 창이 나타나는데, 이때 사용하는 사용자 계정은 <Samba> server를 설정할 때 사용한 "pi" 계정을 사용하고, 암호는 <Samba> server 설정에서 "pi" 계정을 추가할 때 지정한 암호를 사용한다.
모든 접속이 완료되면 아래와 같이 [컴퓨터]에 새로운 네트워크 드라이브가 생성되어 나타난다.
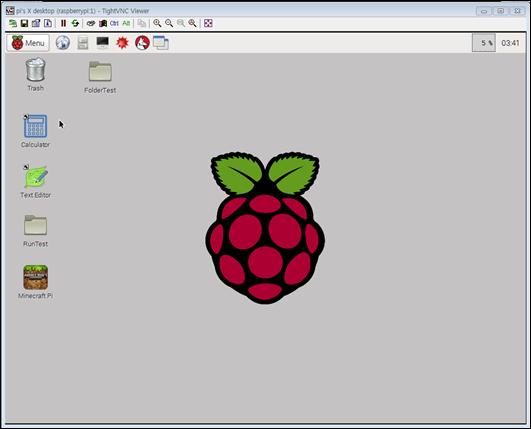
■ 네트워크 추가 방식
다음으로 네트워크 드라이브를 만드는 방식에는 [네트워크 위치 추가]를 이용하는 방식이 있다. 이 방식을 사용하려면 MS Windows 탐색기의 오른쪽 탐색창에 있는 [컴퓨터] 아이콘을 마우스 오른쪽 버튼으로 클릭한다. 그러면 팝업 메뉴가 나타나는데, 여기서 [네트워크 위치 추가] 메뉴를 실행한다.
해당 메뉴를 실행하면 다음과 같이 [네트워크 위치 추가 마법사] 화면이 나타나는데, [사용자 지정 네트워크 위치 선택]을 선택하고 진행한다. 그러면 아래와 같이 네트워크에 대한 위치를 지정하는 화면이 나타나는데, 여기서 Raspberry Pi의 <Samba> server에 대한 정보를 다음과 같은 형식으로 지정한다.
■ 형식 -- \\<Raspberry Pi Server>\<Samba server Name>
■ 입력 -- \\raseberrypi\RootFolder
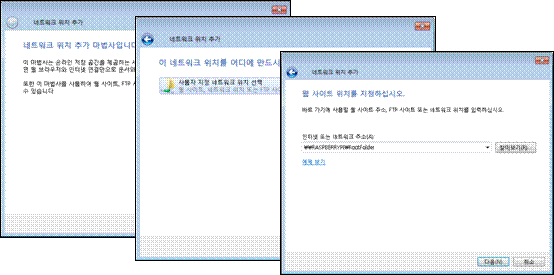
그림 18‑7 MS Windows 네트워크 위치 추가
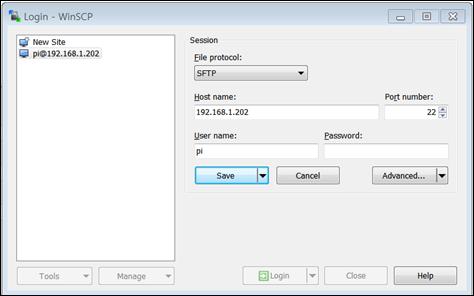
설정을 하고 [다음] 버튼을 누르면 파일 서버에 대한 접속하는 작업이 시작된다. 파일 서버에 처음 접속을 하게 되면 logon 창이 나타나는데, 이때 사용하는 사용자 계정은 <Samba> server를 설정할 때 사용한 "pi" 계정을 사용하고, 암호는 <Samba> server 설정에서 "pi" 계정을 추가할 때 지정한 암호를 사용한다.
모든 접속이 완료되면 아래와 같이 [컴퓨터]에 새로운 네트워크 드라이브가 생성되어 나타난다.
● Apple Mac에서의 연결
Mac에서 접속하려면 [Finder] 메뉴에서 [이동] à [서버에 연결]를 사용한다. 그러면 서버 주소를 입력하는 화면이 나오는데 "smb://raspberrypi/RootFolder"라고 입력하고 실행한다. 그러면 logon 메시지 창이 나타나는데, 이때 사용자 계정으로 "pi"를 사용해야 한다.
● Linux에서의 연결
Linux에서 Raspberry Pi 시스템의 파일 서버에 접속하기 위해서는 해당 driver를 mount한다.
먼저 mount를 하기 위한 directory를 다음과 같이 만든다. 여기서는 "/piRootFolder"를 mount directory로 사용한다.
| $ sudo mkdir /piRootFolder |
|
|
다음은 Raspberry Pi 시스템의 "/RootFolder"를 Linux 시스템의 "/piRootFolder" 폴더로 mount하는 명령이다. 작업이 완료되면 "/piRootFolder"로 자료를 접근할 수 있다.
| $ sudo smbmount –o username=pi,password=raspberry //192.168.1.202/RootFolder /piRootFolder |
|
|