Published Book on Amazon
| All of IOT Starting with the Latest Raspberry Pi from Beginner to Advanced – Volume 1 | |
| All of IOT Starting with the Latest Raspberry Pi from Beginner to Advanced – Volume 2 |
출판된 한글판 도서
| 최신 라즈베리파이(Raspberry Pi)로 시작하는 사물인터넷(IOT)의 모든 것 – 초보에서 고급까지 (상) | |
| 최신 라즈베리파이(Raspberry Pi)로 시작하는 사물인터넷(IOT)의 모든 것 – 초보에서 고급까지 (하) |
Original Book Contents
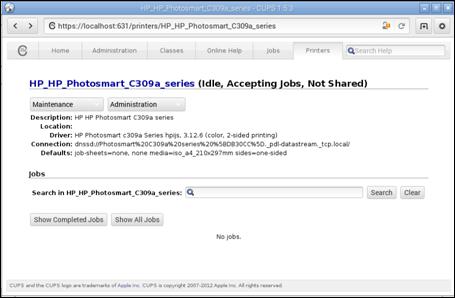
21.4.3 Setting up Printer Server Using <CUPS> Program
After the installation of the <CUPS> program is complete, you need to configure the printer server installed by the <CUPS> program so that it actually works properly, and can connect to the actual printer to be printed on.
First, you need to grant administrator privileges for the printer to a specific user account. Here, we will grant the administration privilege to the "pi" account. Use "usermod" command as follows. This is granting user group "lpadmin" to "pi" account additionally.
| pi@raspberrypi ~ $ sudo usermod –a –G lpadmin pi |
<CUPS> program provides a way to configure necessary works using a web browser. To do this, open the web browser and connect printer server using default port 631 on the local host. Then it connects the configuration screen of <CUPS> program as follows.
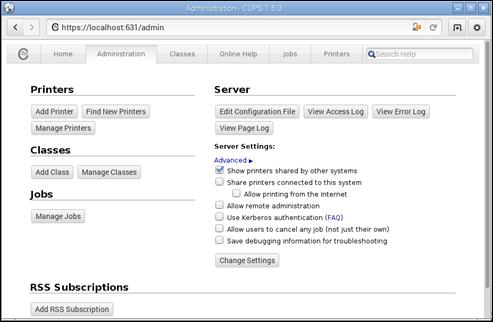
Figure 21‑7 <CUPS> program setup
In this screen, you can add and delete the printer server, adjust various settings of the existing printer server installed, check the status of the printing job currently being processed, and take necessary measures.
In the [Administration] tab, use [Add Printer] button to start adding new printer. This will bring up a pop-up screen to enter a user account and password for the administrator of the printer server. Use the user account specified earlier as the printer administrator.

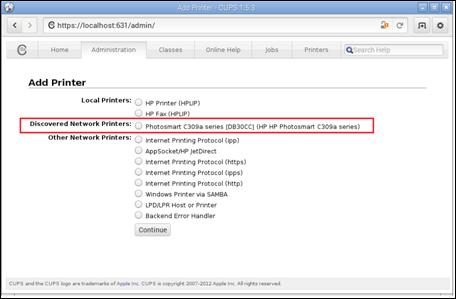
You can then select the type of printer you want to use in the next screen. If you have a printer installed on your network, you will see the list of printers in [Discovered Network Printers] as follows. Select the printer you want to use and press [Continue] button to continue processing.
|
|
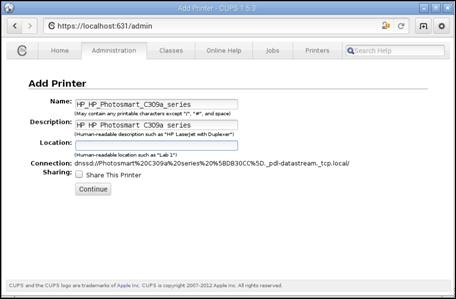
The following screen to install the selected printer will appear. Enter the necessary information and press [Continue] button to continue processing.
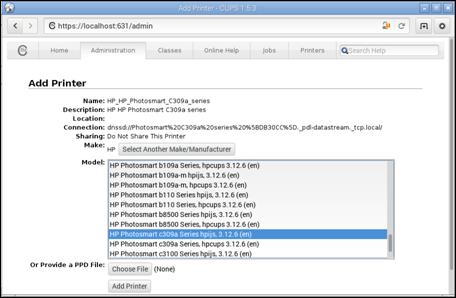
When the following screen to select print drive appears, select the appropriate drive, and then continue with [Add Printer] button.
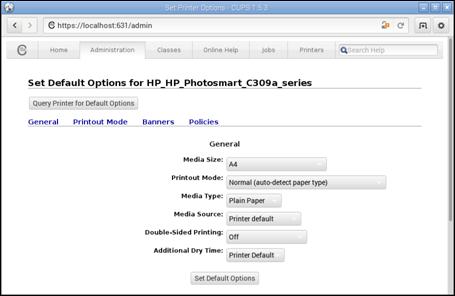
Then, the selected printer will be installed. When the following screen to set default settings for the printer is displayed, set the desired values and press [Set Default Options] button.
Then, after all settings are completed, a screen informing that the printer installation is completed is displayed.