Published Book on Amazon
| All of IOT Starting with the Latest Raspberry Pi from Beginner to Advanced – Volume 1 | |
| All of IOT Starting with the Latest Raspberry Pi from Beginner to Advanced – Volume 2 |
출판된 한글판 도서
| 최신 라즈베리파이(Raspberry Pi)로 시작하는 사물인터넷(IOT)의 모든 것 – 초보에서 고급까지 (상) | |
| 최신 라즈베리파이(Raspberry Pi)로 시작하는 사물인터넷(IOT)의 모든 것 – 초보에서 고급까지 (하) |
Original Book Contents
24.3.2 <Apache web server> 설치
24.3.2.1 <Apache web server> 설치
Raspberry Pi에서 <Apache web server>를 설치할 때는 다음 명령을 사용한다.
| sudo apt-get install apache2 |
다음은 <Apache web server> 설치가 완료된 후, 관련 process가 정상적으로 실행되고 있는지를 확인한 것이다.
| pi@raspberrypi ~ $ ps -ef | grep apache |
| root 14034 1 0 22:33 ? 00:00:00 /usr/sbin/apache2 -k start www-data 14037 14034 0 22:33 ? 00:00:00 /usr/sbin/apache2 -k start www-data 14039 14034 0 22:33 ? 00:00:00 /usr/sbin/apache2 -k start www-data 14040 14034 0 22:33 ? 00:00:00 /usr/sbin/apache2 -k start pi 14120 12889 0 22:34 pts/2 00:00:00 grep --color=auto apache |
이제 <Apache web server>가 설치되었으므로 정상적으로 작동하는지 확인해보도록 하겠다. 이것을 점검하기 위해서는 web browser에서 web server로 접속해 보아야 한다.
web server로 접속하기 위해서는 web server의 IP 주소를 알아야 한다. Raspberry Pi에 대한 IP 주소를 알기 위해서는 "ifconfig" 명령을 사용할 수 있다.
위 화면을 보면, Raspberry Pi에 지정된 IP address 정보를 확인할 수 있다. "eth0" device에 대한 IP address는 "192.168.1.202"이 지정되어 있고, "lo" device에 대한 IP address는 "127.0.0.1"이 지정되어 있다..
먼저 Raspberry Pi 자체 내부에서 web server에 접속해 보자. Raspberry Pi의 window에서 web browser를 열어서 web server로 접속한다. Raspberry Pi 내부에서 자체에 대한 IP 주소가 필요할 때는 "자체"를 의미하는 loopaback device인 "lo"의 IP address인 "127.0.0.1"을 사용할 수도 있고, "localhost"라는 이름을 사용할 수도 있다.
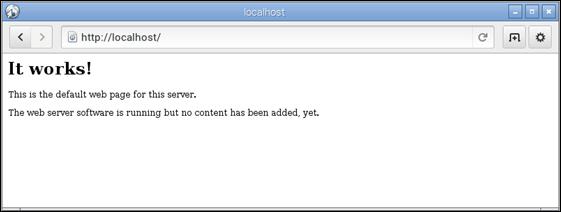
다음은 Raspberry Pi 내부에서 web server에 접속해 본 것이다.
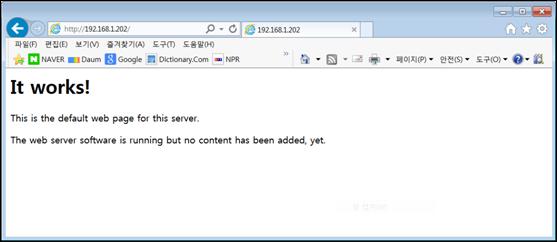
그림 24‑2 Apache web server에 대한 내부접속
이 화면은 Raspberry Pi에 설치된 <Apache web server>가 내부적으로 접속한 web browser 요청에 대해서 정상적으로 작동하는 것을 의미한다.
이제 외부에서 접속해 보도록 하자. Raspberry Pi 시스템의 외부에서 접근할 때는 "Ethernet"를 의미하는 "eth0"에 지정되어 있는 IP address인 "192.168.1.202"를 사용할 수 있다.
아래는 같은 LAN 네트워크에 있는 MS Windows가 설치되어 있는 다른 컴퓨터에서 Raspberry Pi에 설치되어 있는 web server에 접속하는 경우이다.
그림 24‑3 Apache web server에 대한 외부접속
MS explorer에서 역시 이전의 내부 접속과 마찬가지로 동일한 화면이 나타나는 것을 확인할 수 있다. 이것으로 Apache web server가 정상적으로 작동하는 것을 알 수 있다.
24.3.2.2 Apache server 설정
Apache에 대한 설정 파일들은 "/etc/apache2/" 폴더에 있다. 여기에 있는 설정 file들 간에는 서로 계층적인 관계가 있는데, 전체적인 구조는 다음과 같다.

주요 설정 file 목록은 다음과 같다.
■ /etc/apache2/apache2.conf 설정파일
■ /etc/apache2/ports.conf 설정파일
■ /etc/apache2/./conf.d/ 설정파일
■ ./mods-available/ 설정파일
■ ./mods-enabled/ 설정파일
■ *.load 설정파일
■ *.conf 설정파일
■ ./sites-available/ 설정파일
■ / sites-enabled/ 설정파일
● "/etc/apache2/apache2.conf" 파일
이 파일은 Apache의 중심이 되는 설정 파일이다. 다음은 "/etc/apache2/apache2.conf"의 내용에 대한 사례이다. 이 파일에서 다른 설정파일들을 include하고 있음을 알 수 있다.
| ~ 중략 ~ 중략 # ErrorLog: The location of the error log file. # If you do not specify an ErrorLog directive within a <VirtualHost> # container, error messages relating to that virtual host will be # logged here. If you *do* define an error logfile for a <VirtualHost> # container, that host's errors will be logged there and not here. # ErrorLog ${APACHE_LOG_DIR}/error.log
# # LogLevel: Control the number of messages logged to the error_log. # Possible values include: debug, info, notice, warn, error, crit, # alert, emerg. # LogLevel warn
# Include module configuration: Include mods-enabled/*.load Include mods-enabled/*.conf
# Include list of ports to listen on and which to use for name based vhosts Include ports.conf ~ 중략 ~ 중략 # Include generic snippets of statements Include conf.d/
# Include the virtual host configurations: Include sites-enabled/ |
● "/etc/apache2/ports.conf" 파일
이 파일은 <Apache web server>에서 사용하는 port를 정의하는 곳이다. 특정 하나의 port에는 하나의 web site를 지정할 수 있다. 필요하면 여러 개의 port를 정의하여 여러 개의 web site를 운용할 수 있다.
다음은 "ports.conf"의 내용이다.
| # If you just change the port or add more ports here, you will likely also # have to change the VirtualHost statement in # /etc/apache2/sites-enabled/000-default # This is also true if you have upgraded from before 2.2.9-3 (i.e. from # Debian etch). See /usr/share/doc/apache2.2-common/NEWS.Debian.gz and # README.Debian.gz
NameVirtualHost *:80 Listen 80
<IfModule mod_ssl.c> # If you add NameVirtualHost *:443 here, you will also have to change # the VirtualHost statement in /etc/apache2/sites-available/default-ssl # to <VirtualHost *:443> # Server Name Indication for SSL named virtual hosts is currently not # supported by MSIE on Windows XP. Listen 443 </IfModule>
<IfModule mod_gnutls.c> Listen 443 </IfModule>
|
위의 "NameVirtualHost" 항목은 하나의 port를 정의하는 것이다. 외부에서 특정 web site에 접근하고자 할 때 web server의 IP address와 함께 해당 web site를 지칭하는 port를 사용해야 한다. 여기에 정의되는 각각의 항목에 대해 "./sites-enabled/000-default" 파일의 "VirtualHost" 항목에서 해당 web site에 대한 세부 내용을 설정해야 한다. 즉 다음과 같이 정의 내용이 연결이 되는 것이다.

● "./mods-available/"의 파일과 "./mods-enabled/"의 파일
이 곳은 <Apache web server>가 load할 module을 저장하고 있으며, 해당 module이 필요로 하는 설정 내용을 담고 있는 곳이다. 하지만 통상적으로 내용을 변경할 일이 거의 없다.
"./ mods-available/" 폴더는 필요한 사항을 정의하는 곳이며, 정의된 내용을 활성화하여 사용하고자 하면 "./ mods-enabled/" 폴더에 넣어면 된다. "./mods-enabled/" 폴더에 있는 설정 파일은 모두 "./mods-available/" 폴더에서 설정한 내용을 저장하고 있는 동일 이름의 파일을 지칭하고 있는 link 파일이다.
● "./sites-available/"의 파일과 "/sites-enabled/"의 파일
여기는 각 web site에 대한 구체적인 내용을 설정하는 곳이다. web site에서 사용하는 HTML 파일이 관리되는 directory와 관련 CGI 프로그램들이 관리되고 있는 곳에 대한 정보들을 관리하고 있다.
"./ sites-available/" 폴더는 필요한 사항을 정의하는 곳이며, 정의된 내용을 활성화하여 사용하고자 하면 "./ sites-enabled/" 폴더에 넣으면 된다. "./ sites-enabled/" 폴더에 있는 설정 파일은 모두 "./ sites-available/" 폴더에서 설정한 내용을 저장하고 있는 동일 이름의 파일을 지칭하고 있는 link 파일이다.
다음은 "./sites- available/default" 또는 "./sites-enabled/000-default" 파일의 내용이다.
| <VirtualHost *:80> ServerAdmin webmaster@localhost
DocumentRoot /var/www <Directory /> Options FollowSymLinks AllowOverride None </Directory> <Directory /var/www/> Options Indexes FollowSymLinks MultiViews AllowOverride None Order allow,deny allow from all </Directory>
ScriptAlias /cgi-bin/ /usr/lib/cgi-bin/ <Directory "/usr/lib/cgi-bin"> AllowOverride None Options +ExecCGI -MultiViews +SymLinksIfOwnerMatch Order allow,deny Allow from all </Directory>
ErrorLog ${APACHE_LOG_DIR}/error.log
# Possible values include: debug, info, notice, warn, error, crit, # alert, emerg. LogLevel warn
CustomLog ${APACHE_LOG_DIR}/access.log combined </VirtualHost> |
위의 사례는 port "80"에 대한 web site의 내용을 정의한 것으로, "ServerAdmin", "DocumentRoot", "ScriptAlias", "ErrorLog", "LogLevel", "CustomLog" 등에 대한 내용을 정의하고 있다. 설정내용 중에서 "DocumentRoot"에 대한 정의를 보면, "/var/www"가 지정되어 있는데, 이것은 이 web site에서 사용되는 모든 HTML 자료가 "/var/www" 폴더에 저장되어 있다는 것이다.
HTML 자료에 대한 폴더를 보면, 아래와 같이 "index.html"이라는 파일이 저장되어 있다.
| pi@raspberrypi ~ $ ls /var/www -l |
| -rw-r--r-- 1 root root 177 May 20 22:33 index.html |
해당 파일의 내용을 보면, 아래와 같이 HTML tag를 이용하여 내용이 기술되어 있다.
| <html><body><h1>It works!</h1> <p>This is the default web page for this server.</p> <p>The web server software is running but no content has been added, yet.</p> </body></html> |
이 파일을 window의 web browser에서 열어 보면 아래와 같은 화면이 나온다. 앞에서 우리가 <Apache web server>를 설치한 후 처음 접속했을 때 나타난 바로 그 화면인 것을 알 수 있을 것이다.

위의 "index.html" 파일은 web site에서 특별한 의미를 가지는 파일이며, 해당 web site가 시작할 때 특별히 지정되지 않아도 처음 실행되는 HTML 파일이다.