Published Book on Amazon
| All of IOT Starting with the Latest Raspberry Pi from Beginner to Advanced – Volume 1 | |
| All of IOT Starting with the Latest Raspberry Pi from Beginner to Advanced – Volume 2 |
출판된 한글판 도서
| 최신 라즈베리파이(Raspberry Pi)로 시작하는 사물인터넷(IOT)의 모든 것 – 초보에서 고급까지 (상) | |
| 최신 라즈베리파이(Raspberry Pi)로 시작하는 사물인터넷(IOT)의 모든 것 – 초보에서 고급까지 (하) |
Original Book Contents
7.3 Detail Structure of Panel (Menu and Taskbar)
7.3.1 Configuring Panel
The Raspberry Pi system provides useru with the ability to adjust the configuration, processing capabilities, appearance, and location of the Panel according to user's needs. If you press the right mouse button anywhere on the panel, a popup menu like the screen below appears. You can use the [Panel Settings] menu to make the necessary settings.
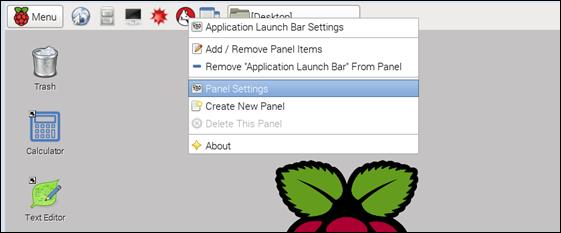
Figure 7‑6 Configring window panel
If you select the appropriate menu, the following popup screen will be displayed. Configuration items are managed separately for each tab. In the [Geometry] screen, you can set the position and size of the panel. In the [Appearance] screen, you can set the color and font size of the panel.
On the [Panel Applets] screen, you can specify a range of panel spaces, specify the program to be run easily for each area, or specify the tools that display system status. The [Advanced] screen allows you to perform other settings related to the panel.

Let's take a closer look at the settings on the [Panel Applets] screen. When the [Add] button is clicked on the screen, a list of programs available to the user is displayed. When the desired item is selected, the item is added to the panel item. You can delete unnecessary items, or you can adjust the position up and down.
For each item selected for the panel, you can define the details by clicking the [Preferences] button. For [Application Launch Bar], you can specify and use a program that users can easily execute without going through the menu.