Published Book on Amazon
| All of IOT Starting with the Latest Raspberry Pi from Beginner to Advanced – Volume 1 | |
| All of IOT Starting with the Latest Raspberry Pi from Beginner to Advanced – Volume 2 |
출판된 한글판 도서
| 최신 라즈베리파이(Raspberry Pi)로 시작하는 사물인터넷(IOT)의 모든 것 – 초보에서 고급까지 (상) | |
| 최신 라즈베리파이(Raspberry Pi)로 시작하는 사물인터넷(IOT)의 모든 것 – 초보에서 고급까지 (하) |
Original Book Contents
24.4.9 Including PHP Script File
PHP provides a way to insert ans use the text/code/markup in a specific file into the current working document. This function is very useful when you need to repeatedly use the same PHP, HTML, or text on multiple pages in PHP.
In PHP, "include" or "require" statement allows a web server to insert the contents of a particular PHP file into the PHP file of current document before executing a particular document.
24.4.9.1 "include" Statement and "require" Statement
"include" and "require" statement insert the contents of the specified file into the current document. You can use the following format.
| include 'filename'; |
| require 'filename'; |
When you find a file to include, use the file path if there is an explicitly specified file path. If the file path is explicitly specified, "include_path" environment variable is ignored regardless of whether it is absolute path or relative path.
If no file path is specified, use the path specified in "include_path" environment variable. If the file does not exist in the location where is specified in "include_path" environment variable, it try to find a file by searching the directory of the script that called "include" and current working directory.
Both "include" and "require" insert the contents of the specified file into the current document, but they are different a little each other.
■ Include
■ The content is added at the time the statement is executed. Therefore, when it is inside the conditional statement, the content is added only when the condition is satisfied.
■ Every time the statement is executed, the content is added. Therefore, if it is repeatedly processed, it is added several times.
■ If the specified file does not exist and an error occurs, a warning message is sent and processing continues.
■ require
■ It is executed when the document starts. Therefore, even if it is inside the conditional statement, it is executed regardless of the condition
■ The content is added only once in the document. Therefore, it is added only once, even if it is executed repeatedly.
■ If the specified file does not exist and an error occurs, a fatal error message is sent and processing stops.
[Used Example]
The following content is written in "content.php" file and will be included in other page.
| <?php $color = 'green'; $fruit = 'apple'; ?> |
This is an example of including the above "content.php" in another document.
| <?php echo "A $color $fruit"; // A include 'content.php'; echo "A $color $fruit"; // A green apple ?> |
The following contens is written in "footer.php" file and it will be used as a standard footer on several web pages.
| <?php echo "<p>Copyright © 2013-" . date("Y") . " www.wemega.com</p>"; ?> |
Below is an example of including the above "footer.php" file with "require" statement.
| <html> <body> <h1>Welcome to my home page!</h1> <p>Some text.</p> <p>Some more text.</p> <?php require 'footer.php';?> </body> </html> |
The following is an example of using "include" and "require" in conditional statements. In this case, both "A.php" and "B.php" will be included. It is because "require" always includes the file content.
| <?php $value = 0; if( $value == 0 ) { include("A.php"); } else { require("B.php"); } ?> |
The following is an example of using "include" to specify a file that does not exist. As there is no file to include, this script sends a warning message and continues processing.
| <html> <body> <h1>Welcome to my home page!</h1> <?php include 'noFileExists.php'; echo "I have a $color $car."; ?> </body> </html> |
The following is an example of using "require" to specify a file that does not exist. As there are no files to include, this script sends a fatal error message and stops processing.
| <html> <body> <h1>Welcome to my home page!</h1> <?php require 'noFileExists.php'; echo "I have a $color $car."; ?> </body> </html> |
24.4.9.2 "include_once" statement and "require_once" statement
When a document must not include one file contents multiple times, it can be instructed to insert it only once. Using "include_once" and "require_once" inserts the contents of the specified file into the current document only once.
| include_once 'filename'; |
| require_once 'filename'; |
■ include_once
■ The basic functionality is the same as "include" statement.
■ If one file content is included already in the document, it is not included anymore.
■ require_once
■ The basic functionality is the same as "require" statement.
■ If one file content is included already in the document, it is not included anymore.
[Used Example]
The following is "echo.php" file.
| <?php echo "Hello"; ?> |
The following is including the "echo.php" file in another file. Executing this will print "Hello" only once. This is because "require_once" command does not include the corresponding file again because it was included earlier by "require" statement.
| test.php <?php require('echo.php'); require_once('echo.php'); ?> |
24.4.10 Transmission Methods of PHP and Key Global Variable
24.4.10.1 POST/GET Method of HTTP and PHP Processing
GET method and POST method can be used when a web browser calls the web server and send the necessary data.
● GET method
GET method constructs the transmitted data in URL format and sends the request in the following format.
| http://URL/?key1=value1&key2=value2 |
Use "?" symbol to separate between URL and transmission data. The transmission data is specified in the format "key=value", and if there are multiple data, they are separated by "&" symbol.
In this method, the entire contents to be transmitted are displayed in URL format and displayed in the web browser. In addition, GET method has a constraint on the amount of data to be transmitted, but the processing speed is relatively faster than POST method.
This method is convenient to store the content of the URL as it is in "Favorites" etc. and to use it again later, but it is difficult to use when sending data requiring confidentiality. Therefore, it is recommended to use GET method when transmitting small volume and less sensitive data.
The data transmitted like this are stored in "$_GET" array variable and "$_REQUEST" array variable on the web server. The values stored here are used as follows.
| $variable = $_GET["key"] |
| $variable = $_REQUEST["key"] |
[Used Example]
The following shows GET method is specified in "form" tag of an HTML document.
| <form action="employee.php" method="get"> Name: <input type="text" name="username" /><br /> Email: <input type="text" name="email" /><br /> <input type="submit" name="submit" value="Submit me!" /> </form> |
The following shows that the transmitted data is refered using variables "$_GET" and "$_REQUEST" in "employee.php" file called above.
| <?php echo $_GET['username']; echo $_REQUEST['username']; ?> |
● POST method
POST method does not send the transmitted data as part of the URL. When using the POST method, the web client calls the web server, then internally calls POST function, and sends the transmission data as an argument of the function directly.
POST method has no limit on the amount of data to be transmitted, so it can be freely used even where a lot of data processing is required. If you use this method, the transmitted data is not displayed in a URL format in your web browser, so you can use it without problems even when you need to send confidential data.
The data transmitted like this is stored in "$_POST" array variable and "$ _REQUEST" array variable on the web server. The values stored here are used as follows.
| $variable = $_POST["key"] |
| $variable = $_REQUEST["key"] |
The following shows that POST method is specified in "form" tag of an HTML document.
| <form action="employee.php" method="post"> Name: <input type="text" name="username" /><br /> Email: <input type="text" name="email" /><br /> <input type="submit" name="submit" value="Submit me!" /> </form> |
The following shows that the transmitted data is refered using "$_POST" variable and "$_REQUEST" variable in "employee.php" file called above.
| <?php echo $_POST['username']; echo $_REQUEST['username']; ?> |
24.4.10.2 Global Variable of PHP
● $_SERVER
"$_SERVER" variable is an array data generated by the web server and contains information such as header, path, script location, and so on. There is no guarantee that all web servers will provide information about all items in the same format, and the items provided may vary according to the web server.
The major informations provided here are as follows.
| Element/Code | Description |
| PHP_SELF | Returns the filename of the currently executing script |
| GATEWAY_INTERFACE | Returns the version of the Common Gateway Interface (CGI) the server is using |
| SERVER_ADDR | Returns the IP address of the host server |
| SERVER_NAME | Returns the name of the host server (such as www.w3schools.com) |
| SERVER_PROTOCOL | Returns the name and revision of the information protocol (such as HTTP/1.1) |
| REQUEST_METHOD | Returns the request method used to access the page (such as POST) |
| REQUEST_TIME | Returns the timestamp of the start of the request (such as 1377687496) |
| QUERY_STRING | Returns the query string if the page is accessed via a query string |
| HTTP_HOST | Returns the Host header from the current request |
| HTTPS | Is the script queried through a secure HTTP protocol |
| REMOTE_ADDR | Returns the IP address from where the user is viewing the current page |
| REMOTE_HOST | Returns the Host name from where the user is viewing the current page |
| REMOTE_PORT | Returns the port being used on the user's machine to communicate with the web server |
| SCRIPT_FILENAME | Returns the absolute pathname of the currently executing script |
| SERVER_ADMIN | Returns the value given to the SERVER_ADMIN directive in the web server configuration file (if your script runs on a virtual host, it will be the value defined for that virtual host) (such as someone@w3schools.com) |
| SERVER_PORT | Returns the port on the server machine being used by the web server for communication (such as 80) |
| SCRIPT_NAME | Returns the path of the current script |
| SCRIPT_URI | Returns the URI of the current page |
| DOCUMENT_ROOT | The document root directory under which the current script is executing, as defined in the server's configuration file. |
Below is an example of using "$_SERVER" variable in a script.
| <html> |
This use "$_SERVER['PHP_SELF']" to determine its own file name and assign it to "action" attribute. It use "$_SERVER["REQUEST_METHOD"]" to determine what the current HTTP request method is, and perform necessary processings only when the method is POST method.
● $GLOBALS
"$GLOBALS" is a PHP super global variable that stores all global variables in "$GLOBALS[index]" array. This variable allows you to use global variables anywhere in the PHP script, in a function, or within method of a class. Variable names are assigned to index.
It can be used in the following format to use that variable.
| $variable = $GLOBALS[‘variable-name’] |
The following shows how to use the super global variable "$GLOBALS".
| <?php |
24.4.11 PHP and MySQL database
24.4.11.1 PHP MySQL extension
The functions for processing MySQL data in PHP are developed and provided as extensions of PHP. The following extensions have been developed so far.
■ Original MySQL extension
This is an extension function that was originally developed to access MySQL data in PHP. It was originally developed with the assumption that it will be applied only to systems prior to MySQL version 4.1.3. It can be applied to later versions, but it can not fully utilize the functions of the latest MySQL server, and it will be discarded in the future.
■ MySQL improved extension (mysqli)
It is a MySQL processing extension that is re-developed to be optimized for an object-oriented programming environment to take full advantage of the latest features of the MySQL database. Many features are included in PHP versions 5 and later. The <mysqli> extension has many advantages over the original MySQL extension. Major advantages are as follows.
√ Object-oriented interface
√ Support for Prepared Statements
√ Support for Multiple Statements
√ Support for Transactions
√ Enhanced debugging capabilities
√ Embedded server support
■ PDO extension
It is an extension that provides a database abstraction layer for PHP applications and allows PHP applications to use all database related functions consistently in the same format regardless of the actual database used. The advantage is that you can easily switch to another database if you need it, but you can not take advantage of all the features of a particular database.
The original MySQL extension will be obsoleted in the future, so you should use the <mysqli> extension or the PDO extension when developing new programs in the future.
For additional information, please see the followings:
■ http://php.net/manual/en/set.mysqlinfo.php
24.4.11.2 Interface Method of the <mysqli>
the <mysqli> extension supports the procedural interface as well as the object-oriented interface. The following shows examples of the object-oriented interface method and the procedural interface method.
| <?php
//========================================= //====== procedural interface //========================================= $mysqli = mysqli_connect("example.com", "user", "password", "database"); if (mysqli_connect_errno($mysqli)) { echo "Failed to connect to MySQL: " . mysqli_connect_error(); }
$res = mysqli_query($mysqli, "SELECT 'A world full of ' AS _msg FROM DUAL"); $row = mysqli_fetch_assoc($res); echo $row['_msg'];
//========================================= //====== object-oriented interface //========================================= $mysqli = new mysqli("example.com", "user", "password", "database"); if ($mysqli->connect_errno) { echo "Failed to connect to MySQL: " . $mysqli->connect_error; }
$res = $mysqli->query("SELECT 'choices to please everybody.' AS _msg FROM DUAL"); $row = $res->fetch_assoc(); echo $row['_msg'];
?> |
The output of the above example is shown below
| A world full of choices to please everybody. |
The usage differences between the two methods are as follows.
| operation | Object-oriented | Procedural |
| creating an object | new mysqli ( ) | mysqli_connect ( ) |
| running a function | $object->function( … ) | mysqli_function($object, … ) |
| referring to arrtibute | $object->attribute | mysqli_attribute($object) |
Basically, the object-oriented method systematically classifies and manages functions and attributes based on objects, so it is easy to understand and has various advantages in development and follow-up management. There is no difference in performance between the two methods, and the user can freely select the desired one according to his preference. You can also mix both ways in one document, but it is not recommended to make your code easier to understand.
24.4.11.3 Details of <mysqli> Object-Oriented Interface
Here we describe in detail the properties and methods of the object-oriented interface of <mysqli>.
● Property and method of "mysqli" class
To use the data in a MySQL database, you must first connect the database. Also, the connection should be maintained in the process of using the data in the database. The "mysqli connect" is responsible for connecting to the specified MySQL database. It is also responsible for interworking with MySQL in all future SQL processing.
"mysqli" class is an object class to manage and process this "mysqli connect". It must be created as an object in advance and used.
The properties and methods available in this class are as follows.
| OOP Interface | Description | |
| Properties | $mysqli::affected_rows | Gets the number of affected rows in a previous MySQL operation |
| $mysqli::client_info | Returns the MySQL client version as a string | |
| $mysqli::client_version | Returns MySQL client version info as an integer | |
| $mysqli::connect_errno | Returns the error code from last connect call | |
| $mysqli::connect_error | Returns a string description of the last connect error | |
| $mysqli::errno | Returns the error code for the most recent function call | |
| $mysqli::error | Returns a string description of the last error | |
| $mysqli::field_count | Returns the number of columns for the most recent query | |
| $mysqli::host_info | Returns a string representing the type of connection used | |
| $mysqli::protocol_version | Returns the version of the MySQL protocol used | |
| $mysqli::server_info | Returns the version of the MySQL server | |
| $mysqli::server_version | Returns the version of the MySQL server as an integer | |
| $mysqli::info | Retrieves information about the most recently executed query | |
| $mysqli::insert_id | Returns the auto generated id used in the last query | |
| $mysqli::sqlstate | Returns the SQLSTATE error from previous MySQL operation | |
| $mysqli::warning_count | Returns the number of warnings from the last query for the given link | |
| Methods | mysqli::autocommit() | Turns on or off auto-committing database modifications |
| mysqli::change_user() | Changes the user of the specified database connection | |
| mysqli::character_set_name(), mysqli::client_encoding | Returns the default character set for the database connection | |
| mysqli::close() | Closes a previously opened database connection | |
| mysqli::commit() | Commits the current transaction | |
| mysqli::__construct() | Open a new connection to the MySQL server [Note: static (i.e. class) method] | |
| mysqli::debug() | Performs debugging operations | |
| mysqli::dump_debug_info() | Dump debugging information into the log | |
| mysqli::get_charset() | Returns a character set object | |
| mysqli::get_connection_stats() | Returns client connection statistics. Available only with mysqlnd. | |
| mysqli::get_client_info() | Returns the MySQL client version as a string | |
| mysqli::get_client_stats() | Returns client per-process statistics. Available only with mysqlnd. | |
| mysqli::get_cache_stats() | Returns client Zval cache statistics. Available only with mysqlnd. | |
| mysqli::get_server_info() | NOT DOCUMENTED | |
| mysqli::get_warnings() | NOT DOCUMENTED | |
| mysqli::init() | Initializes MySQLi and returns a resource for use with mysqli_real_connect. [Not called on an object, as it returns a $mysqli object.] | |
| mysqli::kill() | Asks the server to kill a MySQL thread | |
| mysqli::more_results() | Check if there are any more query results from a multi query | |
| mysqli::multi_query() | Performs a query on the database | |
| mysqli::next_result() | Prepare next result from multi_query | |
| mysqli::options() | Set options | |
| mysqli::ping() | Pings a server connection, or tries to reconnect if the connection has gone down | |
| mysqli::prepare() | Prepare an SQL statement for execution | |
| mysqli::query() | Performs a query on the database | |
| mysqli::real_connect() | Opens a connection to a mysql server | |
| mysqli::real_escape_string(), mysqli::escape_string() | Escapes special characters in a string for use in an SQL statement, taking into account the current charset of the connection | |
| mysqli::real_query() | Execute an SQL query | |
| mysqli::refresh() | Flushes tables or caches, or resets the replication server information | |
| mysqli::rollback() | Rolls back current transaction | |
| mysqli::select_db() | Selects the default database for database queries | |
| mysqli::set_charset() | Sets the default client character set | |
| mysqli::set_local_infile_default() | Unsets user defined handler for load local infile command | |
| mysqli::set_local_infile_handler() | Set callback function for LOAD DATA LOCAL INFILE command | |
| mysqli::ssl_set() | Used for establishing secure connections using SSL | |
| mysqli::stat() | Gets the current system status | |
| mysqli::stmt_init() | Initializes a statement and returns an object for use with mysqli_stmt_prepare | |
| mysqli::store_result() | Transfers a result set from the last query | |
| mysqli::thread_id() | Returns the thread ID for the current connection | |
| mysqli::thread_safe() | Returns whether thread safety is given or not | |
| mysqli::use_result() | Initiate a result set retrieval |
Table 24‑1 Property and method of "mysqli" class
● property and method of "mysqli_stmt" class
"mysqli statement" stands for pre-prepared SQL statements that can be executed most efficiently depending on the current state of the database before the SQL statement actually executes. Using prepared SQL statement like this, it is possible to check the problem of SQL statement before executing SQL statement, and make preparation to execute SQL statement efficiently.
"mysqli_stmt" class is an object class to manage and process this "mysqli statement". It must be created as an object in advance and used.
The properties and methods that is avail in this class are as follows.
| OOP Interface | Description | |
| Properties | $mysqli_stmt::affected_rows | Returns the total number of rows changed, deleted, or inserted by the last executed statement |
| $mysqli_stmt::errno | Returns the error code for the most recent statement call | |
| $mysqli_stmt::error | Returns a string description for last statement error | |
| $mysqli_stmt::field_count | Returns the number of field in the given statement - not documented | |
| $mysqli_stmt::insert_id | Get the ID generated from the previous INSERT operation | |
| $mysqli_stmt::num_rows | Return the number of rows in statements result set | |
| $mysqli_stmt::param_count | Returns the number of parameter for the given statement | |
| $mysqli_stmt::sqlstate | Returns SQLSTATE error from previous statement operation | |
| Methods | mysqli_stmt::attr_get() | Used to get the current value of a statement attribute |
| mysqli_stmt::attr_set() | Used to modify the behavior of a prepared statement | |
| mysqli_stmt::bind_param() | Binds variables to a prepared statement as parameters | |
| mysqli_stmt::bind_result() | Binds variables to a prepared statement for result storage | |
| mysqli_stmt::close() | Closes a prepared statement | |
| mysqli_stmt::data_seek() | Seeks to an arbitrary row in statement result set | |
| mysqli_stmt::execute() | Executes a prepared Query | |
| mysqli_stmt::fetch() | Fetch results from a prepared statement into the bound variables | |
| mysqli_stmt::free_result() | Frees stored result memory for the given statement handle | |
| mysqli_stmt::get_result() | Gets a result set from a prepared statement. Available only with mysqlnd. | |
| mysqli_stmt::get_warnings() | NOT DOCUMENTED | |
| $mysqli_stmt::more_results() | NOT DOCUMENTED Available only with mysqlnd. | |
| $mysqli_stmt::next_result() | NOT DOCUMENTED Available only with mysqlnd. | |
| mysqli_stmt::num_rows() | See also property $mysqli_stmt::num_rows | |
| mysqli_stmt::prepare() | Prepare an SQL statement for execution | |
| mysqli_stmt::reset() | Resets a prepared statement | |
| mysqli_stmt::result_metadata() | Returns result set metadata from a prepared statement | |
| mysqli_stmt::send_long_data() | Send data in blocks | |
| mysqli_stmt::store_result() | Transfers a result set from a prepared statement |
Table 24‑2 Property and method of "mysqli_stmt" class
● Property and method of "mysqli_result" class
"mysqli result" is a query result created as a result of executing an SQL SELECT statement, which means a data set consisting of several rows retrieved from the specified tables of a particular database. Each row retrieved here is composed of multiple columns.
"mysqli_result" class is an object class to manage and process this "mysqli result". It must be created as an object in advance and used.
The properties and methods that are available in this class are as follows.
| OOP Interface | Description | |
| Properties | $mysqli_result::current_field | Get current field offset of a result pointer |
| $mysqli_result::field_count | Get the number of fields in a result | |
| $mysqli_result::lengths | Returns the lengths of the columns of the current row in the result set | |
| $mysqli_result::num_rows | Gets the number of rows in a result | |
| Methods | mysqli_result::data_seek() | Adjusts the result pointer to an arbitrary row in the result |
| mysqli_result::fetch_all() | Fetches all result rows and returns the result set as an associative array, a numeric array, or both. Available only with mysqlnd. | |
| mysqli_result::fetch_array() | Fetch a result row as an associative, a numeric array, or both | |
| mysqli_result::fetch_assoc() | Fetch a result row as an associative array | |
| mysqli_result::fetch_field_direct() | Fetch meta-data for a single field | |
| mysqli_result::fetch_field() | Returns the next field in the result set | |
| mysqli_result::fetch_fields() | Returns an array of objects representing the fields in a result set | |
| mysqli_result::fetch_object() | Returns the current row of a result set as an object | |
| mysqli_result::fetch_row() | Get a result row as an enumerated array | |
| mysqli_result::field_seek() | Set result pointer to a specified field offset | |
| mysqli_result::free(), mysqli_result::close, mysqli_result::free_result | Frees the memory associated with a result |
Table 24‑3 Property and method of "mysqli_result" class
24.4.11.4 Usage of <mysqli> Object-Oriented Interface
In PHP, you need to connect to the database in advance to use the data in the MySQL database.
● Creating "connect" object
To connect to a MySQL database, you first perform connection operation using the database connection information, create an object, and store the connect information for that database to "connect" object. Later, when it is necessary to actually execute SQL statements to refer to the data in the database, you execute the SQL statement through "connect" object created earlier.
To connect to a MySQL database, you execute "mysqli( )" function, and use "new" command to create the object, and then stores the connect information to "connect" object. The basic format is as follows.
| $connect_object = new mysqli( ‘host-name’ , ‘user-id’ , ‘password’ , ‘database-name’ ) |
● Running SQL to query database data
"query( )" function is used to process specific SQL statements against a MySQL database. "query( )" function returns the result of executing the SQL statement, returning the result as an object of the form "result" object. The basic processing format is as follows.
| $result_object = $connect_object->query( "SELECT-SQL" ) |
● Processing queried database data
A "result" object may contain multiple data elements. Executing "fetch_assoc( )" function returns the data contained in the result object one by one, returning the result as an object of the form "row" object. The basic processing format is as follows.
| $row_object = $result_object->fetch_assoc( ) |
A "row" object contains data for several columns together. To refer to the data for each column, the column is specified in the format ["column-name"]. The basic processing format is as follows.
| $data-variable = $row_object["column-name"] |
Normally, a "result" object has several data, so for sequential iterative processing, it can be usually processed as follows by using "while" command.
| while ( $row_object = $result_object->fetch_assoc( ) ) { statement-1 ; statement-2 ; } |
● Closing "connect"
If you no longer need a database connection, you should terminate "connect" using "close( )" function as follows. The basic processing format is as follows.
| $connect_object->close( ) |
24.4.12 Simple PHP Web Page
We will here perform operations to query, input, modify, and delete data in MySQL by using PHP.
24.4.12.1 Preparing Main Document
Create the document as follows and save it in "index.php" file.
| <!DOCTYPE html> <html> <head> <title> Handling Employee Information By MySQL and PHP </title> </head> <body> <p><a href=" /employee_list.php"> Employee List </a></p> <p><a href="/employee_update.php"> Employee Detail Update</a></p> </body> </html> |
In the above document, "/employee_list.php" script file is linked to the "Employee List" statement and "/employee_update.php" script file is linked to the "Employee Detail Update" statement.
If you run this file through a web browser, the following screen appears.
|
|
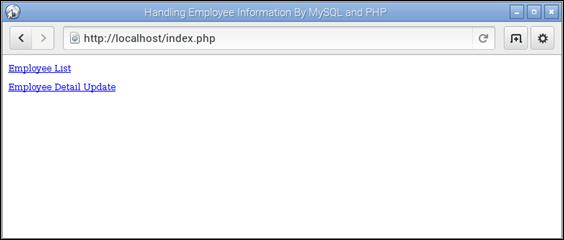
Figure 24‑10 PHP Web example - starting screen of main document
This is the document for the main starting screen for future work. If you click "Employee List" on this screen, you will go to the web page which inquires the data from "employee" table of the database. If you click "Employee Detail Update", you will go to the web page screen which changes the data of "employee" table of the database. .
24.4.12.2 Preparing Works for Database and Table
The database used here will use the database and table used to explain MySQL earlier. The details are as follows.
■ database -- raspi_db
■ table -- employee
■ id -- INT -- PRIMARY KEY, AUTO_INCREMENT
■ name -- VARCHAR(50)
■ birth -- DATE
■ position_code -- CHAR(10)
■ dept_code -- CHAR(10)
■ manager_name -- VARCHAR(50)
■ sales -- DECIMAL(10,0)
■ salary_rate -- NUMERIC(6,2)
24.4.12.3 Connecting and Disconnecting Database
● Connecting to database
Here we will connect to the database using <mysqli> extension. The following information is required for database connection.
■ host name -- localhost
This can be assigned an IP address or a URL to the host. Here "localhost" is used because MySQL is installed on the same server.
■ user -- pi
■ password -- xxxxxx
■ database -- raspi_db
First, create a "mysqli" object to connect to the MySQL database as shown below.
| <?php $mysqli = new mysqli('localhost', 'pi', 'xxxxxx', 'raspi_db');
echo 'Success... ' . $mysqli->host_info . "\n";
?> |
Here we create a "mysqli" object and store it in "$mysqli" variable. When the object is created, it tries to connect to the MySQL database internally. If the connection is successfully completed, all the connection related information is stored in "$mysqli" variable. The object stored in "$mysqli" variable handles all future work with MySQL.
● Terminating connection to database
If all processing for the database is finished, the connection to the database is terminated. It can be processed as follows.
| <?php $mysqli->close( ) ; ?> |
24.4.12.4 Writing script to Query Data in Database Table
Here, we will create a script that queries the data in "employee" table of the database.
● Writing a basic HTML and table layout
Create a PHP file with the following HMTL contents and store it in "employee_list.php".
| <!DOCTYPE html> <html> <head> <title> Handling Employee Information By MySQL and PHP </title> <style> table, th, td { border: 1px solid black; border-collapse: collapse; } th, td { padding: 5px; } </style> </head>
<body> <h1>Employee List</h1> <table> <!-- table의 header --> <tr> <th>id </th> <th>name </th> <th>birth </th> <th>position_code </th> <th>dept_code </th> <th>manager_name </th> <th>sales </th> <th>salary </th> </tr> </table> </body> </html> |
Here, an HTML document is created using <table> tag to display multiple retrieved list data in a table layout. A header part is added when defining <table>, and <style> is specified for each part of the table in <head> part.
When you run this script, the following screen is displayed.
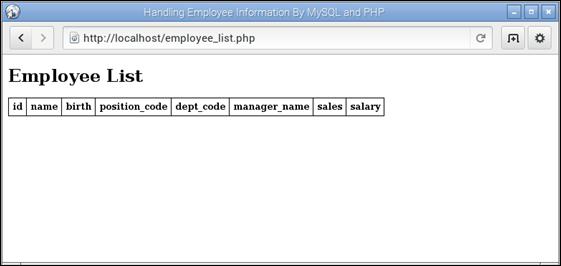
Figure 24‑11 PHP Web example – "Employee List"
● Querying data in database table
Here we use "$mysqli" object created earlier to retrieve the data from the database table.
First read the data from the table. The following SELECT statement is used in SQL statements to read data from the table.
| select * from employee |
The following is querying table data.
| <?php $select_sql = "elect * from employee" ; $result = $mysqli->query ($select_sql); ?> |
Executing "$mysql->query( )" with the above SELECT SQL statement reads and returns data from the specified table, and the data is stored in "$result" object.
● Handling data in table
The next step is to display each retrieved data one by one in a table layout. This should be included within the HTML <table> tag. Read the data in "$result" object one by one, store it in the "$row" object, read the data by one column at a time, and output it using <td> tag.
| <?php while ($row = $result->fetch_assoc()) { print "<tr>" ; print "<td>".$row[ "id" ]."</td>" ; print "<td>".$row[ "name" ]."</td>" ; print "<td>".$row[ "birth" ]."</td>" ; print "<td>".$row[ "position_code" ]."</td>" ; print "<td>".$row[ "dept_code" ]."</td>" ; print "<td>".$row[ "manager_name" ]."</td>" ; print "<td>".$row[ "sales" ]."</td>" ; print "<td>".$row[ "salary" ]."</td>" ; print "</tr>" ; } ?> |
● Combining all script to query data
Below is integrating all the scripts reviewed so far into "employee_list.php".
| <!DOCTYPE html> <html> <head> <title> Handling Employee Information By MySQL and PHP </title> <style> table, th, td { border: 1px solid black; border-collapse: collapse; } th, td { padding: 5px; } </style> </head> <body> <h1>Employee List</h1> //connect database <?php $mysqli = new mysqli('localhost', 'pi', 'xxxxxx', 'raspi_db'); if ($mysqli->connect_error) { die('Connect Error (' . $mysqli->connect_errno . ') '. $mysqli->connect_error); } echo 'Success... ' . $mysqli->host_info . "\n"; ?> <table> <!-- table의 header --> <tr> <th>id </th> <th>name </th> <th>birth </th> <th>position_code </th> <th>dept_code </th> <th>manager_name </th> <th>sales </th> <th>salary </th> </tr> // select data from database table <?php $select_sql = "elect * from employee" ; $result = $mysqli->query ($select_sql); if (!$result) { die('Invalid query: ' . mysql_error()); } printf("Select returned %d rows.\n", $result->num_rows); ?> // table data content <?php while ($row = $result->fetch_assoc()) { print "<tr>" ; print "<td>".$row[ "id" ]."</td>" ; print "<td>".$row[ "name" ]."</td>" ; print "<td>".$row[ "birth" ]."</td>" ; print "<td>".$row[ "position_code" ]."</td>" ; print "<td>".$row[ "dept_code" ]."</td>" ; print "<td>".$row[ "manager_name" ]."</td>" ; print "<td>".$row[ "sales" ]."</td>" ; print "<td>".$row[ "salary" ]."</td>" ; print "</tr>" ; } ?> </table>
<?php $mysqli->close( ) ; ?> </body> </html> |
24.4.12.5 Writing Scrit to Update Database Table Data
Here we will create a script that changes the data in "employee" table of the database.
● Preparing form
Create the basic HMTL as follows and save it in "employee_update.php".
| <!DOCTYPE html> <html> <head> <title> Handling Employee Information By MySQL and PHP </title> </head>
<body> <h1>Employee Detail Update</h1> <form action="employee_update.php" method="POST"> function: <input type="text" name="function" /> <br /><br />
id : <input type="text" name="id" /> <br /> name <input type="text" name="name" /> <br /> birth <input type="text" name="birth" /> <br /> position_code <input type="text" name="position_code" /> <br /> dept_code <input type="text" name="dept_code" /> <br /> manager_name <input type="text" name="manager_name" /> <br /> sales <input type="text" name="sales" /> <br /> salary <input type="text" name="salary" /> <br />
<input type="submit" /> </ form>
</body> </html> |
Here we use <form> tag to define the form required for input. When you define a form, you specify the script file name to "action", and specify the POST method to "method".
The form contains <input> tag in which you can enter data for each column of the database table. Finally, <input> tag of "submit" button is also used to send the form data to the web server.
Inside the form, an <input> tag called "function" is created to input the operation to do in the database with this form. The value specified here will determine the type of changing operation to be processed in the database table:
■ insert -- Insert data in table.
■ update -- Change data in table.
■ delete -- Delete data in table.
When executing the script, the following screen is displayed.
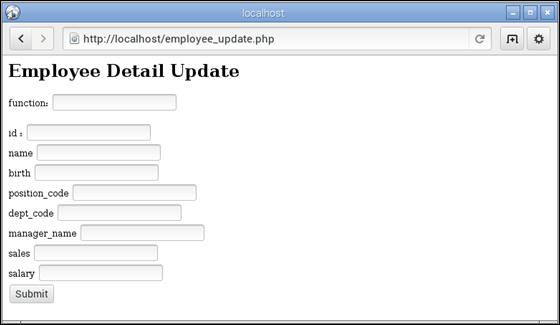
Figure 24‑12 PHP Web example – "Employee Detail Update"
● Modifying table data
When inserting data into a table, use the following form of SQL statement.
| INSERT INTO employee SET name = "John" , birth = "1960-05-17", position_code = "11111", dept_code = "E1000", manager_name = "Mike", sales = "300000", salary = "600000" |
When updating a table data, use the following form of SQL statement.
| update employee SET name = "John" , birth = "1960-05-17" , position_code = "11111" , dept_code = "E1000" , manager_name = "Mike" , sales = "300000" , salary = "600000" where id = 1 ; |
When deleting table data, use the following form of SQL statement.
| delete employee where id = 3 |
Here is a PHP statement that modifies the data in the table. It defines a function for each "insert", "update", and "delete", and performs the necessary processing according to the value of "function" entered in the form.
| // main processing If (isset( $_POST["function"] ) ) { switch ( $_POST["function"] ) { case "insert": employee_insert() ; break; case "update": employee_update() ; break; case "delete": employee_insert() ; break; default: echo "function is incorrect"; } }
// define insert table function function employee_insert () { $update_sql = " INSERT INTO employee "; $update_sql = $update_sql." name = ’".$_POST["name"]."’ , " ; $update_sql = $update_sql." birth = ’".$_POST["birth"]."’ , " ; $update_sql = $update_sql." position_code = ’".$_POST["position_code"]."’ , " ; $update_sql = $update_sql." dept_code = ’".$_POST["dept_code"]."’ , " ; $update_sql = $update_sql." manager_name = ’".$_POST["manager_name"]."’ , " ; $update_sql = $update_sql." sales = ’".$_POST["sales"]."’ , " ; $update_sql = $update_sql." salary = ’".$_POST["salary"]."’ " ;
if ($mysqli->query($update_sql) === TRUE) { echo "insert successfully"; } else { echo "insert error: " . $conn->error; } }
// define update table function function employee_update () { $update_sql = "DELETE employee SET "; $update_sql = $update_sql." name = ’".$_POST["name"]."’ , " ; $update_sql = $update_sql." birth = ’".$_POST["birth"]."’ , " ; $update_sql = $update_sql." position_code = ’".$_POST["position_code"]."’ , " ; $update_sql = $update_sql." dept_code = ’".$_POST["dept_code"]."’ , " ; $update_sql = $update_sql." manager_name = ’".$_POST["manager_name"]."’ , " ; $update_sql = $update_sql." sales = ’".$_POST["sales"]."’ , " ; $update_sql = $update_sql." salary = ’".$_POST["salary"]."’ , " ; $update_sql = $update_sql." WHERE id = ’".$_POST["id"]."’ " ;
if ($mysqli->query($update_sql) === TRUE) { echo "update successfully"; } else { echo "update error: " . $conn->error; } }
// define delete table function function employee_delete () { $update_sql = "DELETE employee "; $update_sql = $update_sql." WHERE id = ’".$_POST["id"]."’ " ;
if ($mysqli->query($update_sql) === TRUE) { echo "delete successfully"; } else { echo "delete error : " . $conn->error; } } |
● Combinig all scripts to modify table data
Below is combining all the scripts reviewed so far into "employee_update.php" file.
| <!DOCTYPE html> <html> <head> <title> Handling Employee Information By MySQL and PHP </title> </head> <body> <h1>Employee Detail Update</h1>
<?php $mysqli = new mysqli('localhost', 'pi', 'xxxxxx', 'raspi_db'); if ($mysqli->connect_error) { die('Connect Error (' . $mysqli->connect_errno. ') '. $mysqli->connect_error); } echo 'Success... ' . $mysqli->host_info . "\n"; ?>
<form action="employee_update.php" method="POST"> function: <input type="text" name="function" /> <br /> <br /> id : <input type="text" name="id" /> <br /> name <input type="text" name="name" /> <br /> birth <input type="text" name="birth" /> <br /> position_code <input type="text" name="position_code" /> <br /> dept_code <input type="text" name="dept_code" /> <br /> manager_name <input type="text" name="manager_name" /> <br /> sales <input type="text" name="sales" /> <br /> salary <input type="text" name="salary" /> <br /> <input type="submit" /> </ form>
// main processing If (isset( $_POST["function"] ) ) { switch ( $_POST["function"] ) { case "insert": employee_insert() ; break; case "update": employee_update() ; break; case "delete": employee_insert() ; break; default: echo "function is incorrect"; } }
// close database connection <?php $mysqli->close( ) ; ?>
// define insert table function function employee_insert () { $update_sql = " INSERT INTO employee "; $update_sql = $update_sql." name = '".$_POST["name"]."' , " ; $update_sql = $update_sql." birth = '".$_POST["birth"]."' , " ; $update_sql = $update_sql." position_code = '".$_POST["position_code"]."' , " ; $update_sql = $update_sql." dept_code = '".$_POST["dept_code"]."' , " ; $update_sql = $update_sql." manager_name = '".$_POST["manager_name"]."' , " ; $update_sql = $update_sql." sales = '".$_POST["sales"]."' , " ; $update_sql = $update_sql." salary = '".$_POST["salary"]."' " ;
if ($mysqli->query($update_sql) === TRUE) { echo "insert successfully"; } else { echo "insert error: " . $conn->error; } }
// define update table function function employee_update () { $update_sql = "DELETE employee SET "; $update_sql = $update_sql." name = '".$_POST["name"]."' , " ; $update_sql = $update_sql." birth = '".$_POST["birth"]."' , " ; $update_sql = $update_sql." position_code = '".$_POST["position_code"]."' , " ; $update_sql = $update_sql." dept_code = '".$_POST["dept_code"]."' , " ; $update_sql = $update_sql." manager_name = '".$_POST["manager_name"]."' , " ; $update_sql = $update_sql." sales = '".$_POST["sales"]."' , " ; $update_sql = $update_sql." salary = '".$_POST["salary"]."' , " ; $update_sql = $update_sql." WHERE id = '".$_POST["id"]."' " ;
if ($mysqli->query($update_sql) === TRUE) { echo "update successfully"; } else { echo "update error: " . $conn->error; } }
// define delete table function function employee_delete () { $update_sql = "DELETE employee "; $update_sql = $update_sql." WHERE id = '".$_POST["id"]."' " ;
if ($mysqli->query($update_sql) === TRUE) { echo "delete successfully"; } else { echo "delete error : " . $conn->error; } }
</body> </html> |
24.4.12.6 Flow of Managing Screen for Table "employee"