Published Book on Amazon
| All of IOT Starting with the Latest Raspberry Pi from Beginner to Advanced – Volume 1 | |
| All of IOT Starting with the Latest Raspberry Pi from Beginner to Advanced – Volume 2 |
출판된 한글판 도서
| 최신 라즈베리파이(Raspberry Pi)로 시작하는 사물인터넷(IOT)의 모든 것 – 초보에서 고급까지 (상) | |
| 최신 라즈베리파이(Raspberry Pi)로 시작하는 사물인터넷(IOT)의 모든 것 – 초보에서 고급까지 (하) |
Original Book Contents
24.3.4 Simple HTML Web Page
24.3.4.1 Using Link to Other URL
Next is an example of linking a URL of another homepage to a specific sentence, and if clicking the sentence, the screen is switched to the specified URL.
| <!DOCTYPE html> <html> <body> <p><a href=" http://www.raspberrypi.org/">Visit our homepage for many information</a></p> </body> </html> |
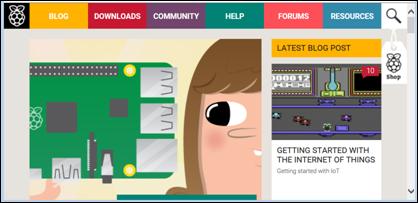
When the HTML is executed, a sentence linked to an URL is displayed as follows.

Figure 24‑4 HTML and Hyper-link
If clicking on the above sentence, it switches to the screen below.
24.3.4.2 Using Table
The following is an example of defining a table and specifying a title of the table at once.
| <!DOCTYPE html> <html> <head> <style> table, th, td { border: 1px solid black; border-collapse: collapse; } th, td { padding: 5px; } </style> </head> <body> <table style="width:100%"> <tr> <th>Firstname</th> <th>Lastname</th> </tr> <tr> <td>Jill</td> <td>Smith</td> </tr> <tr> <td>Eve</td> <td>Jackson</td> </tr> </table> </body> </html> |
When you execute the HTML above, the table data is displayed on the screen as shown below.

Figure 24‑5 Example of HTML table
24.3.4.3 Using Frame
The following is an example of defining a frame on a part of screen with "iframe" tag and showing the content of another URL.
| <!DOCTYPE html> <html> <body>
<p>The following is the home page of www.raspberrypi.org.</p>
<iframe width="100%" height="300px" src="http://www.raspberrypi.org/" name="iframe_a"></iframe>
<p><a href="http://www.raspberrypi.org/help" target="iframe_a">raspberrypi help</a></p>
<p>When the target of a link matches the name of an iframe, the link will open in the iframe.</p>
</body> </html>
|
When you execute the above HTML, a frame showing the content of another web site is displayed in the middle of the screen as below. If you click "raspberrypi help" at the bottom of the screen, you can see that the contents shown in the frame change to different contents.
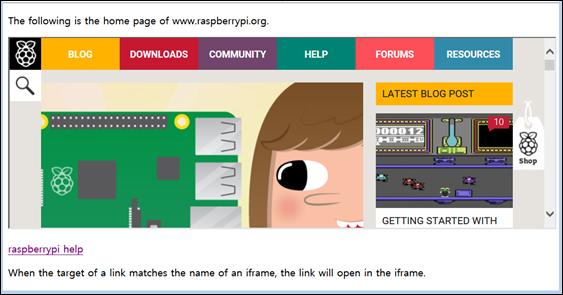
Figure 24‑6 Example of HTML iframe
24.3.4.4 Using Style
● internal style (internal CSS)
Internal style defines the style in HTML <head> section within the document. The definition here applies only to that document and not to other documents.
| <!DOCTYPE html> <html> <head> <style> body {background-color:lightgrey} h1 {color:blue} p {color:green} </style> </head> <body>
<h1>This is a heading</h1> <p>This is a paragraph.</p>
</body> </html> |
In the above <head> part, style is defined for <body>, <h1>, and <p> tag. You can see that the style is applied to each tag according to the contents specified in <style> tag.

Figure 24‑7 Example of HTML internal styling
● external styling (external CSS)
External style is stored in a separate external CSS file and linked using <link> tag in the <head> part of HTML document.
External style sheet is useful when you want to apply the same style to multiple pages. Using this approach, you can change all the web pages to which it applies at once by changing only the contents of the CSS file.
| <!DOCTYPE html> <html> <head> <link rel="stylesheet" href="styles.css"> </head> <body>
<h1>This is a heading</h1> <p>This is a paragraph.</p>
</body> </html> |
The following is "styles.css" CSS style file referenced in the above HTML document
.
| <style> body {background-color:lightgrey} h1 {color:blue} p {color:green} </style> |
You can create a web page with the same style as the previous example of internal style.
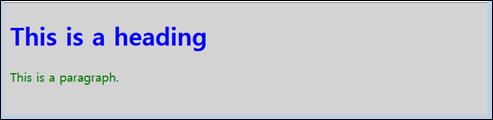
Figure 24‑8 Example of HTML external styling
24.3.4.5 Entering Data Using Form
The following is an example of explaining how to create a place where data can be entered on the screen with <form> tag, input some data on the screen, press a specific button, and transmit the input data to a web server.
| <!DOCTYPE html> <html> <body>
<form action="action_page.php" method="POST">
First name: <input type="text" value="Mickey"> <br> Last name: <input type="text" name="lastname" value="Mouse"> <br>
<input type="radio" name="sex" value="male" checked>Male <br>
<input type="submit" value="Send">
</form>
<p>If you click "Send", the form-data will be sent to a page called "action_page.php".</p>
<p>The first name will not be submitted, because the input element does not have a name attribute.</p>
</body> </html> |
■ "name" attribute of <input>
"name" attribute specified when defining <input> serves as a key to specify the corresponding input value in the form. Therefore, if "name" attribute is not specified, the data in the form can not be distinguished. Therefore, when form data is sent to web server using "GET" or "POST" method specified in <form>, data that does not specify "name" attribute is not transmitted.
■ "type" attribute of <input> : "submit" value
<input> where "type" has "submit" value defines a button that sends input data of form to web server's form-handler. Form-handler is a script file on web server that normally handles input data, specified in "action" attribute of <form> tag.
■ "action" attribute of <form>
"action" attribute specifies the next action to be performed when sending(submit) form data to web server. Normally, form data is assigned to a specific web page file on web server. The simplest way for "submit" is to use "submit" button defined in the form.
■ "method" attribute of <form>
"method" attribute specifies HTTP transport method used to send form data to web server. "GET" and "POST" method can be used. Unless otherwise specified, "GET" method is the default value.
When using "GET" method, the form data to be transmitted is represented together with requested page address as shown below. "GET" method has a limitation on data amount to be transmitted, so it is not appropriate for the case where many data are processed. If you use this method, transmission data will be displayed together in the transmitted URL. Therefore, you can keep the displayed URL in "Favorites" etc. and use it again later. Therefore, it is good to use "GET" method for transferring small volume and non-sensitive data.
| action_page.php?firstname=Mickey&lastname=Mouse |
"POST" method transmits data to web server with internal function, so transmitted data is not displayed in the URL. Thus, it is good to use "POST" method when you want to change data on the web server or to process sensitive data like password.